
This guide covers how to link participants.
Link Participants
Linking participants connects their Paddle Numbers so they can share bidding, payments, and checkout activity. It's most commonly done during Check-In, but can also be done from the Participant Details page.
Paddle Numbers Required To Link
Participants must have Paddle Numbers assigned before they can be linked. See Participant Numbering for more information.
Link at Check-In
From the left sidebar, click Check-In. Use the search bar to find the participant you want to check in, then click their name to open their record.
You can link participants at check-in in three ways:
Suggested guests — At the bottom of the check-in screen, Auctria may suggest other guests to include. Click Include in check-in to add them.
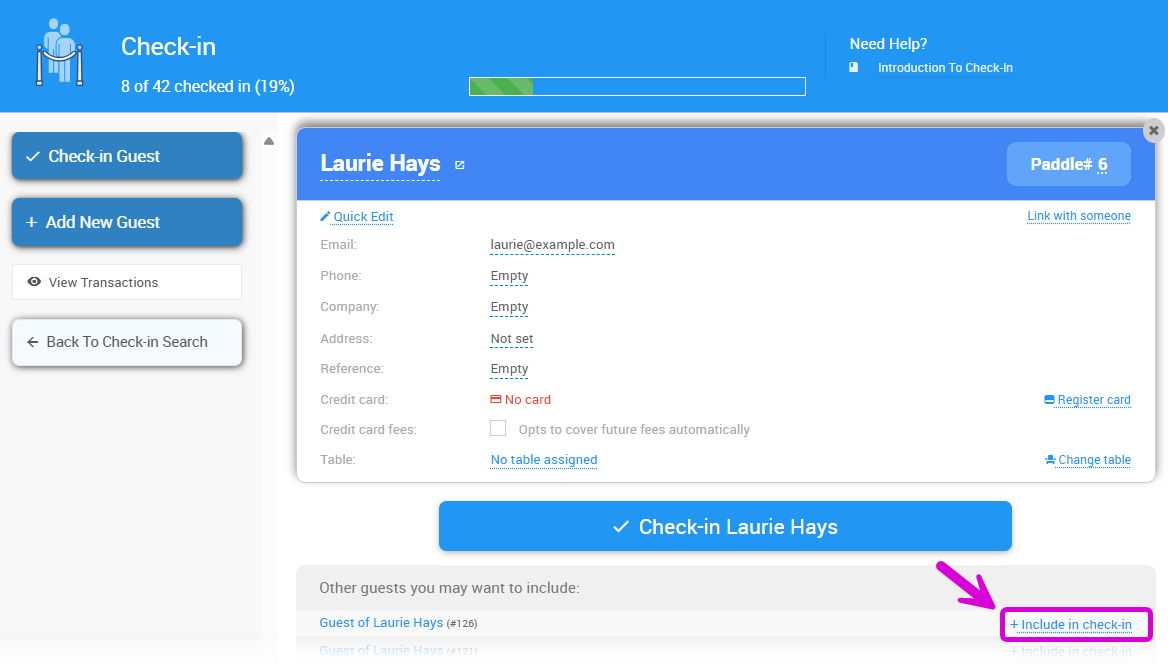
An example from a demonstration event.
A banner will appear prompting you to link the guests and suggesting a Paddle# to use. Click the Paddle# you want the linked guests to share.

An example from a demonstration event.
Add a new guest — Click Add New Guest to create a new participant record.
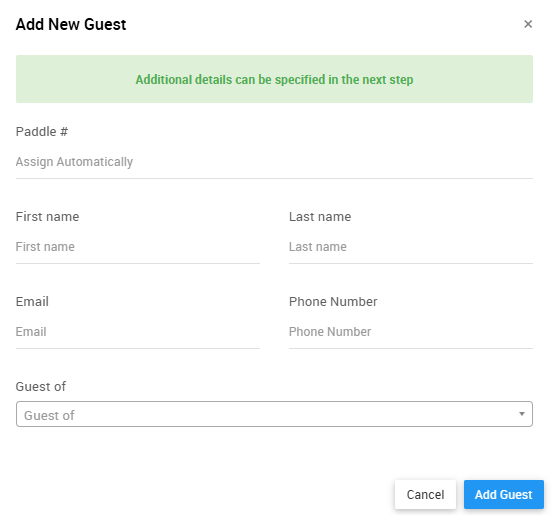
An example from a demonstration event.
Then click Link with someone, enter the new guest's name, and choose which Paddle# the linked participants should use.

An example from a demonstration event.
Link with someone — Click Link with someone, enter the name or Paddle# of the guest you want to link to, then choose which Paddle# the linked participants should use.
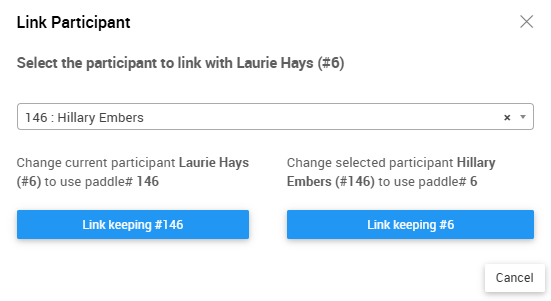
An example from a demonstration event.
Link from Participant Details
From the left sidebar, click Participants. Use the search bar to find the participant you want to link, then click their name to open their Participant Details page.
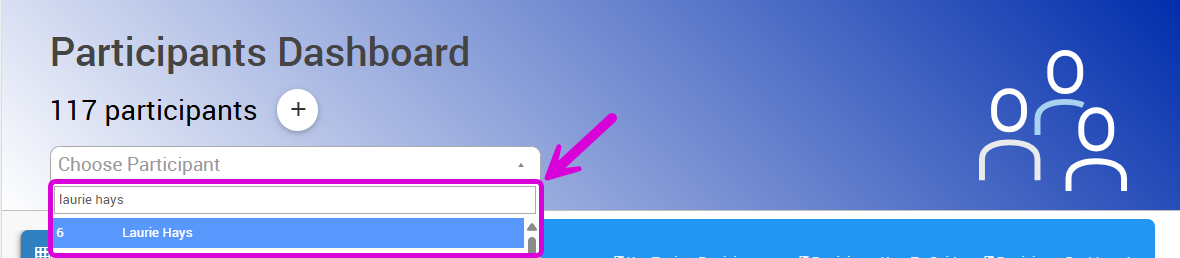
An example from a demonstration event.
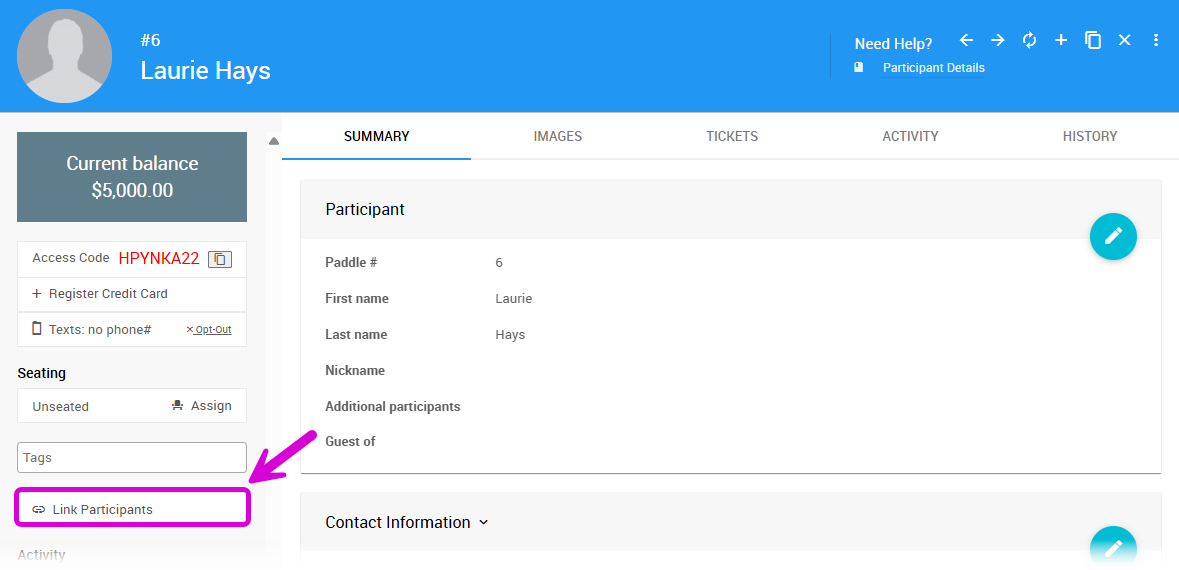
Click the Link Participants button in the left sidebar.
An example from a demonstration event.
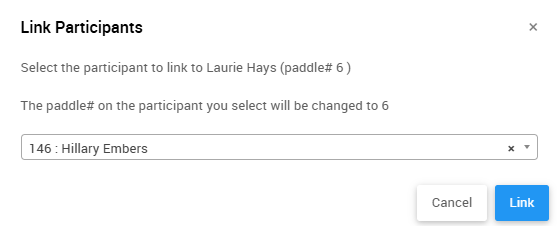
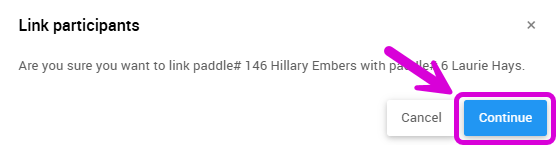
Enter the name or Paddle# of the guest you want to link and select them from the list, then click Link and Continue to confirm.
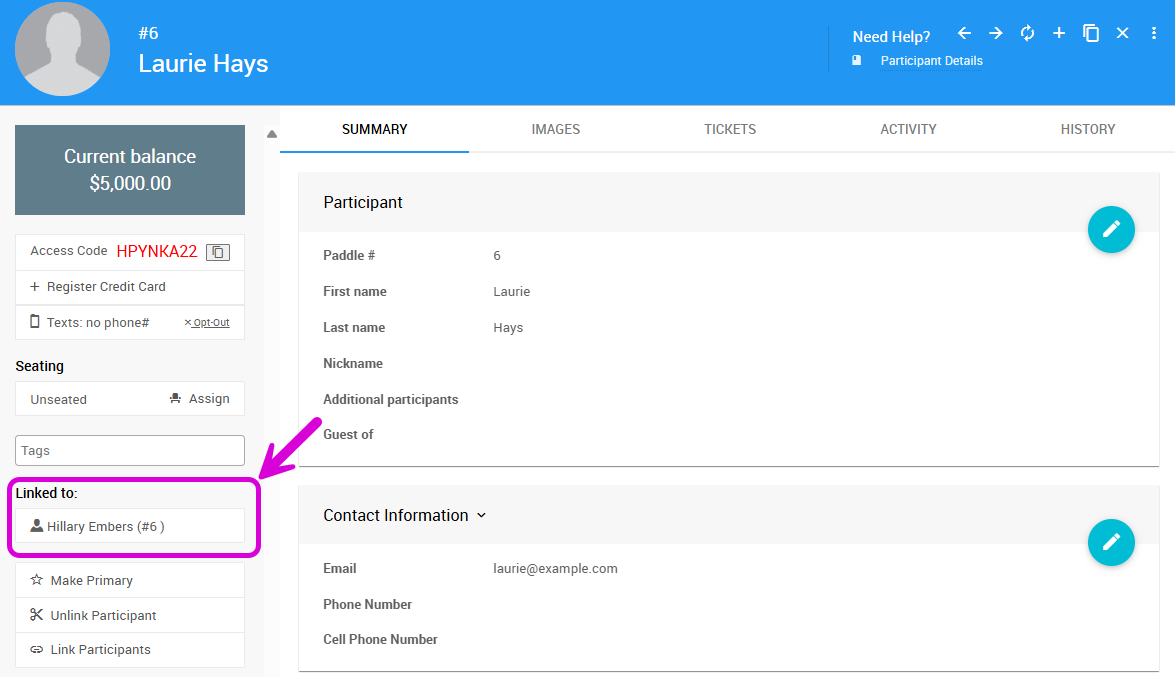
Linked guests will appear in the Linked to section of the left sidebar on the Participant Details page.
Set a Primary Participant
After linking, you can designate one participant as the Primary Participant. The primary record is used as the main account for the group — it appears first in reports, statements, and chooser lists, and is the default contact for receipts and communications.
To set a primary, open their Participant Details page and click Make Primary in the left sidebar.
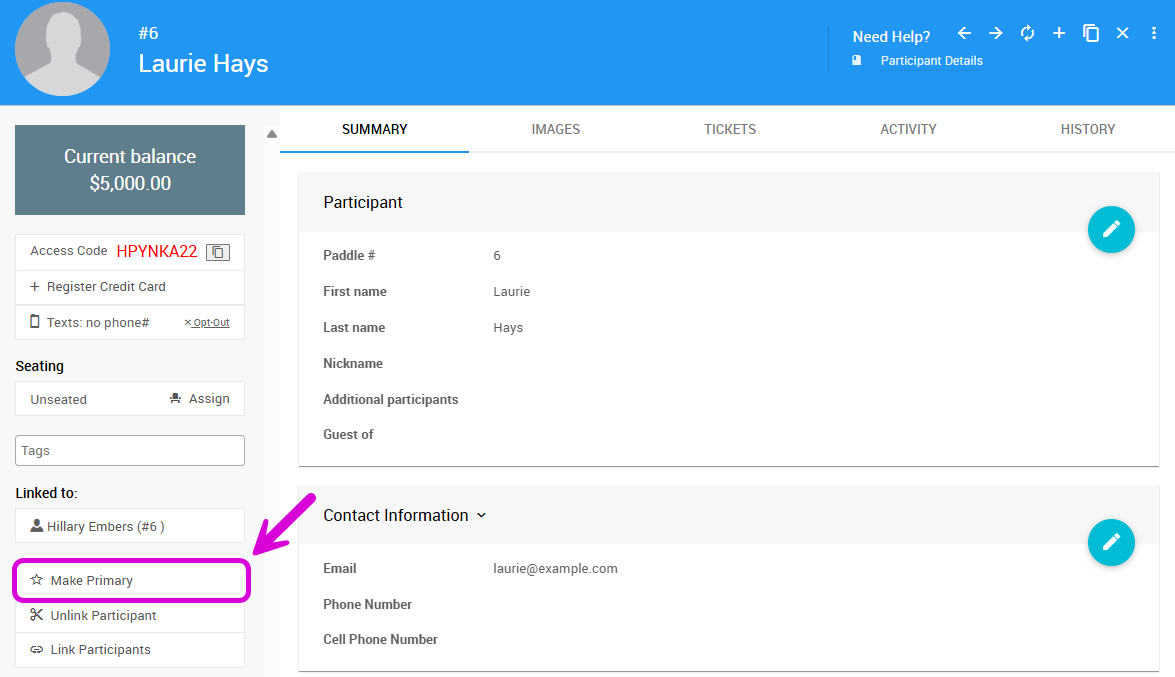
The Make Primary button on the Participant Details page.
Only one participant in a linked group can be primary at a time — selecting a new primary automatically clears the previous one. A ⭐ icon marks the primary participant at check-in, on their record, and in search results.
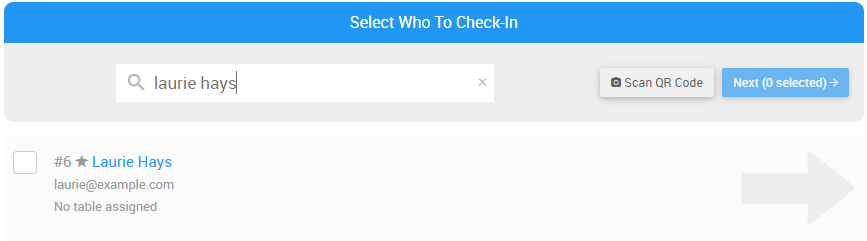
The primary participant is highlighted with a ⭐ during check-in.
When To Set Primary Participant
Setting a Primary Participant after linking helps keep check-in and checkout smooth for your team and guests.