
Check in guests from your phone with the Auctria Admin App.
Find your guest, confirm their details, and check them in. Most check-ins take just a few taps.
The Quick Version
- Tap Check-in.
- Scan the guest's check-in QR code, or search for their name.
- Tap Next • Guest Info.
- Tap Check-in • [Guest Name].
The rest of this page is optional. Use it when a guest needs a change.
Before You Start
Sign in to the Admin App and open your event. For help, see Introduction to the Auctria Admin App.
Can't Sign In?
You need to be added as a user for the organization. Ask your event organizer for access.
Step 1: Find Your Guest
- Tap Check-in at the bottom of the screen.
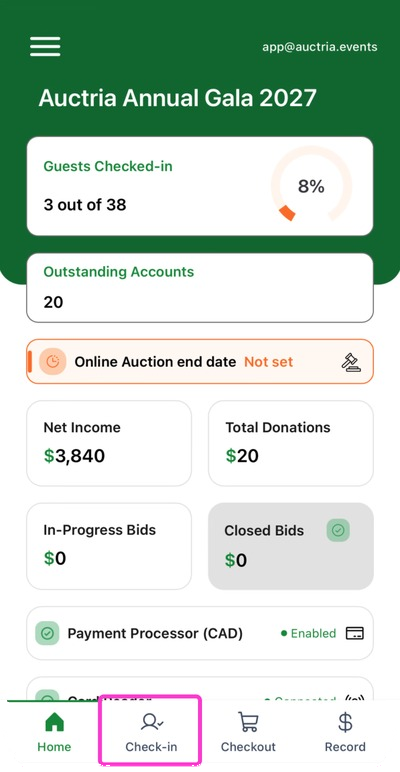
An example Admin App Home Screen from a demonstration event.
- Find your guest. Do one of the following:
- Tap the QR code icon, then scan the guest's check-in QR code.
- Type part of their name in the search bar, then tap their name.
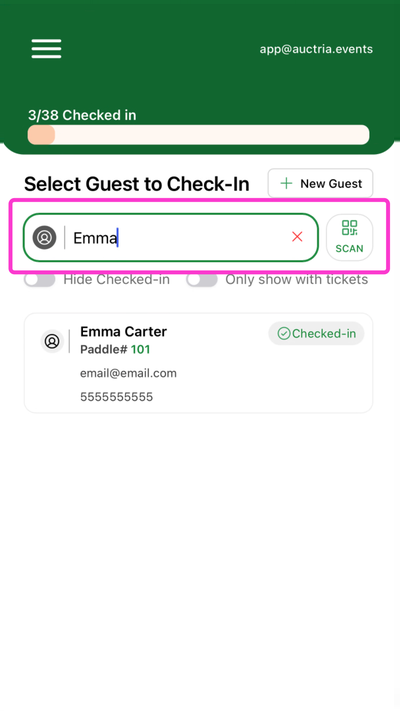
An example Check-In List from a demonstration event.
For more on scanning, see Unknown link 'ScanQRCodes'.
Filter the Guest List
Use the list filters to narrow your results:
- Hide Checked-in shows only guests who still need to check in.
- Only show with tickets hides guests who aren't assigned a ticket. Guests on someone else's ticket still show.
Tools on the Check-In List
- The N/M Checked in bar shows how many guests have checked in so far.
- View shows the guests you've selected.
- Reset clears your selection.
- Guests who are already checked in show an Already Checked-in badge.
Step 2: Review Guest Info
- Tap Next • Guest Info at the bottom of the screen.
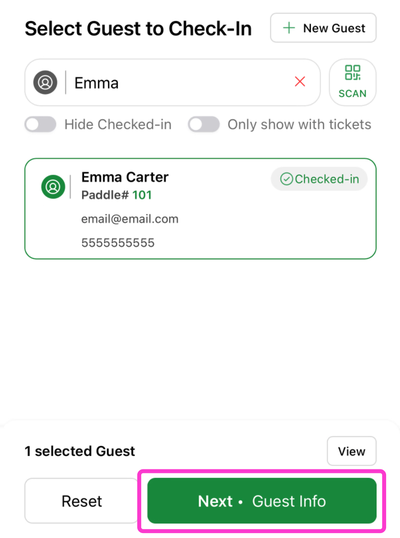
An example Check-In List with selected guests from a demonstration event.
- Review the guest's details. To make changes, see Update Guest Details or Add a Credit Card.
Guests linked to your guest appear as extra tabs on the Guest Details screen. To leave one out of this check-in, tap the × on their tab.
Step 3: Complete Check-In
- Tap Check-in • [Guest Name] at the bottom of the screen. If you're checking in a group, the button shows +N for the number of extra guests.
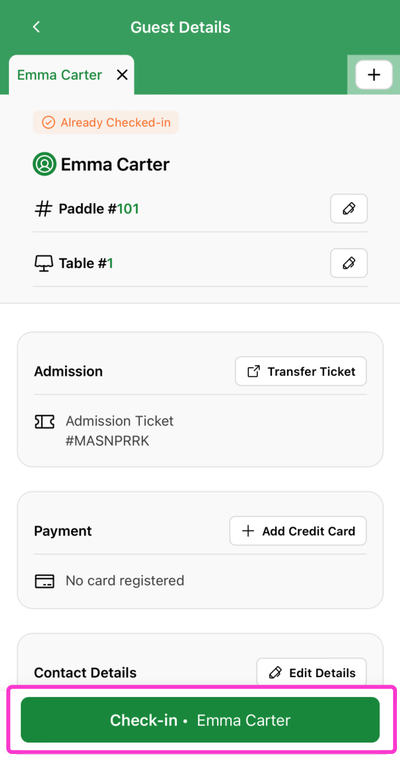
An example Guest Details screen from a demonstration event.
- When Guest checked in! appears, tap Okay.
Your guest receives the check-in email and text set in Check-In Settings, including their link to the event website.

:::
Add a New Guest
Use this when a guest isn't on the list.
- On the Check-In List, tap New Guest.
- Enter their first name, last name, email, and phone number.
- Enter a Paddle #, or leave it blank to assign the next available number.
- Save the new guest, then check them in as usual.
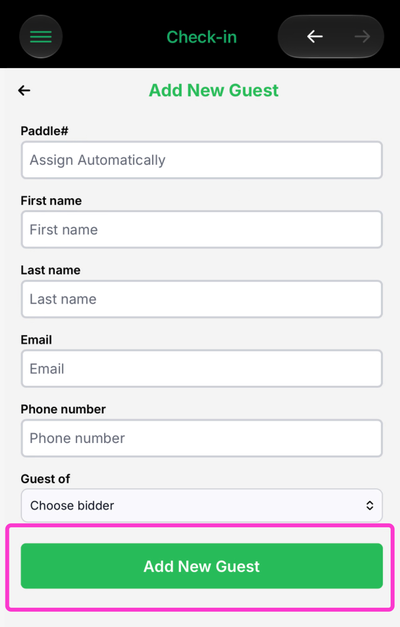
An example Add New Guest form from a demonstration event.
Update Guest Details
The Guest Details screen has two cards you can edit: Contact Details (name, email, phone) and Address.
- Tap Edit Details on the card you want to change.
- Update the information.
- Tap Save • Contact details (or the save button for the card you're editing). Tap Cancel to discard your changes.
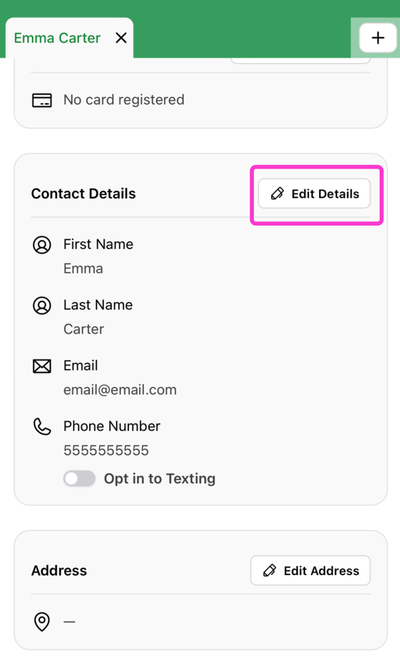
An example Contact Details card from a demonstration event.
Note
Other Info, such as meal choice, dietary restrictions, company, and reference, can't be edited in the Admin App.
Change a Paddle#
- Tap the edit icon next to the Paddle#.
- In the Change Paddle# window, choose Enter a paddle# and type a number, or choose Auto-assign next available.
- Tap Assign.
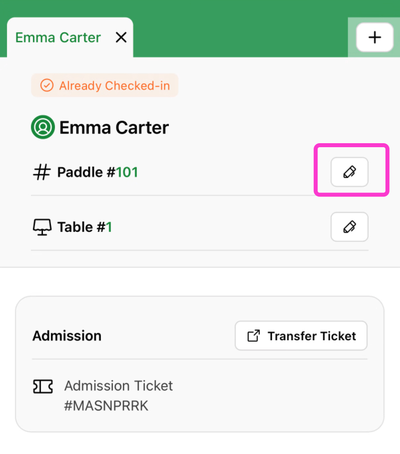
An example Change Paddle# window from a demonstration event.
If the guest is linked to others, Change paddle# on all linked guests to match is checked by default. Uncheck it to change only this guest's number.
Paddle# Already in Use?
If you enter a number that belongs to another guest, the two guests are linked. They share the Paddle# and payment. The app doesn't warn you first, so double-check the number.
Change a Table Number
- Tap the edit icon next to the table number.
- In the Change Table# window, choose a table from the list.
- Tap Assign.
To take the guest off their table, tap Remove Guest from Table.
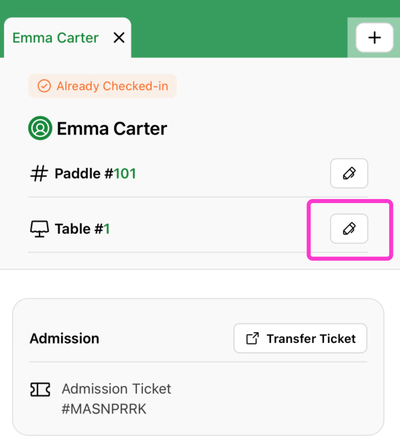
An example Change Table# window from a demonstration event.
Note
Only tables already created for the event appear in the list.
Add a Credit Card
The Payment card shows the card type and last four digits, or No card registered.
- On the Guest Details screen, tap Add Credit Card.
- Ask the guest to tap their card on your phone or your paired card reader.
- Wait for the card type and last four digits to appear.
To remove a card from the guest's profile, tap Remove Card.
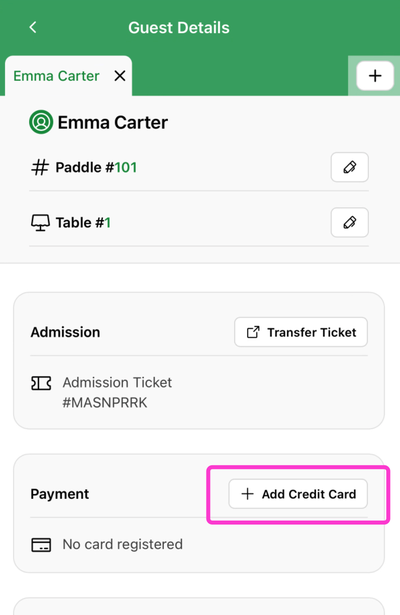
An example Payment card from a demonstration event.
Check Linked Guests First
The Payment card only shows the selected guest's own card. If a linked guest already has a card, it covers the whole group, even when this guest shows No card registered. Check the other tabs before you add a second card.
You Can't Type Card Numbers
The Admin App doesn't accept manually entered card numbers. Use Tap to Pay or a paired card reader.
Don't See Add Credit Card?
- The button only appears when your organization has payments set up.
- Tap to Pay doesn't work on tablets. Use a phone or a paired card reader.
- Tap to Pay only works for events that process payments through Stripe.
- Ask your event administrator, or see Set Up Tap to Pay and Card Readers.
Check In Related Guests Together
Related guests are part of the same ticket purchase, such as a table, sponsorship, or couples ticket.
- Tap the + button at the top right of the Guest Details banner.
- In the Related guests list, tap Add next to each guest you want to check in.
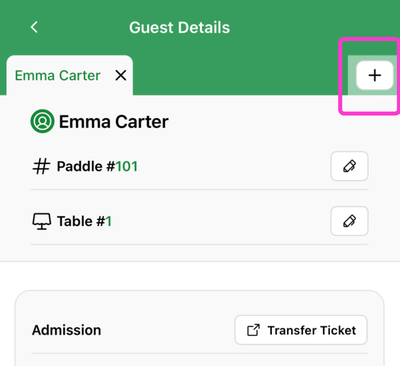
An example Related Guests list from a demonstration event.
When you add a guest, anyone linked to them is added too. Each guest you add is checked in when you tap Check-in • [Guest Name] +N.
Link Guests to Share a Paddle#
Some guests, such as couples, want to bid with one Paddle#.
- Add both guests to the current check-in.
- Tap Link Selected Guests at the bottom right of the screen.
- Choose the Paddle# to share, or assign a new one.
- Tap Link Guests.
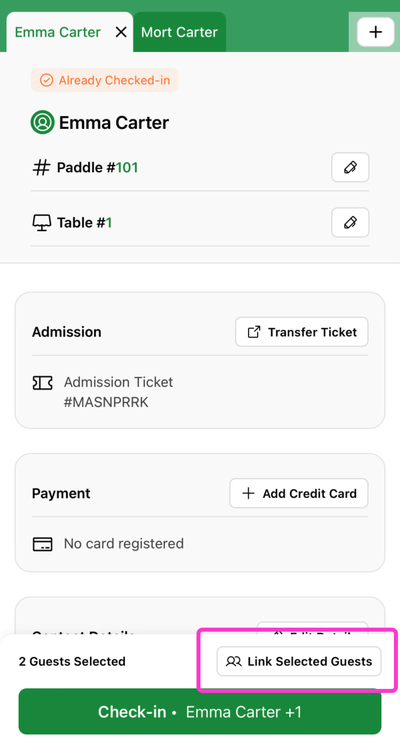
An example Link Selected Guests window from a demonstration event.
Linked Guests Share Payment
Linked guests share a Paddle#, and a card registered on any one of them covers the whole group. Confirm with both guests before you link them.
For more, see How To Link Participants.
Unlink Guests
- Tap Unlink on the linked guest's card.
- Choose to unlink just that guest, or tap Unlink All Guests.

An example Unlink window from a demonstration event.
Set Up Tap to Pay and Card Readers
This section is for event administrators. Set this up before event night so volunteers can add cards at check-in.
Requirements
- Your organization has payments set up, and your event processes payments through Stripe.
- Volunteers using Tap to Pay are on a phone, not a tablet.
- Volunteers using a Bluetooth card reader have paired it with their device.
For setup steps, see Mobile Card Readers and Unknown link 'RegisteringCreditCards'.
Test Before Event Night
Add a test card on each volunteer's device before guests arrive. Fix problems before there's a line at the door.
Troubleshooting
| Problem | What to Try |
|---|---|
| Add Credit Card is missing | Confirm your organization has payments set up through Stripe, and that you're using a phone with an up-to-date Admin App. |
| Tap to Pay is missing | Switch from a tablet to a phone, or use a paired card reader. |
| Card reader won't connect | Turn Bluetooth off and on, then pair the reader again. See Mobile Card Readers. |
| Guest's card won't read | Ask the guest to hold the card still on the back of the phone for a few seconds. |
| App is slow or won't load | Switch from venue Wi-Fi to your phone's mobile data. |
| App and dashboard don't match | Check that your phone is paired with the dashboard. See How To Pair A Phone And Laptop. |
Video Walkthrough
Watch: Admin App Check-In Training
This video shows an earlier version of the Admin App. The screens look different, but the check-in steps are mostly the same.