
Learn how to add extra information, like pick-up and delivery details, to the System Emails your guests receive during an Online Only Auction.
When you run an Online Only Auction, you'll often need to tell guests, especially winning bidders, how they can pick up or receive their won items. One of the easiest ways to do this is to add the relevant information to your outgoing emails.
The System Emails most commonly used for this are the Item Won Notifications, Bidder Registration/Purchase Receipts, and Bidder Statements:
| Description | |
|---|---|
| Online bidding: Item won (time) | An Item Won Notification, sent when an auction item closes. |
| Online bidding: Item bought (buy-it-now) | An Item Won Notification, sent when an item is sold. |
| Online Registration/Purchase Receipt | Sent as part of the Registration/Checkout process. |
| Statement | Contains a summary of all of a bidder's transactions. |
See System Emails Summary for more general information about these emails and notifications.
Editing Emails
Most of the edits for an Online Only Auction add text to the emails to share information that isn't included in the default System Emails. You can do this in one of two ways: edit an existing element, or add a new element.
To start, go to Communication → System Emails in your Default Dashboard. Then click the Edit link beside the System Email you want to change. This opens the Email Editor.
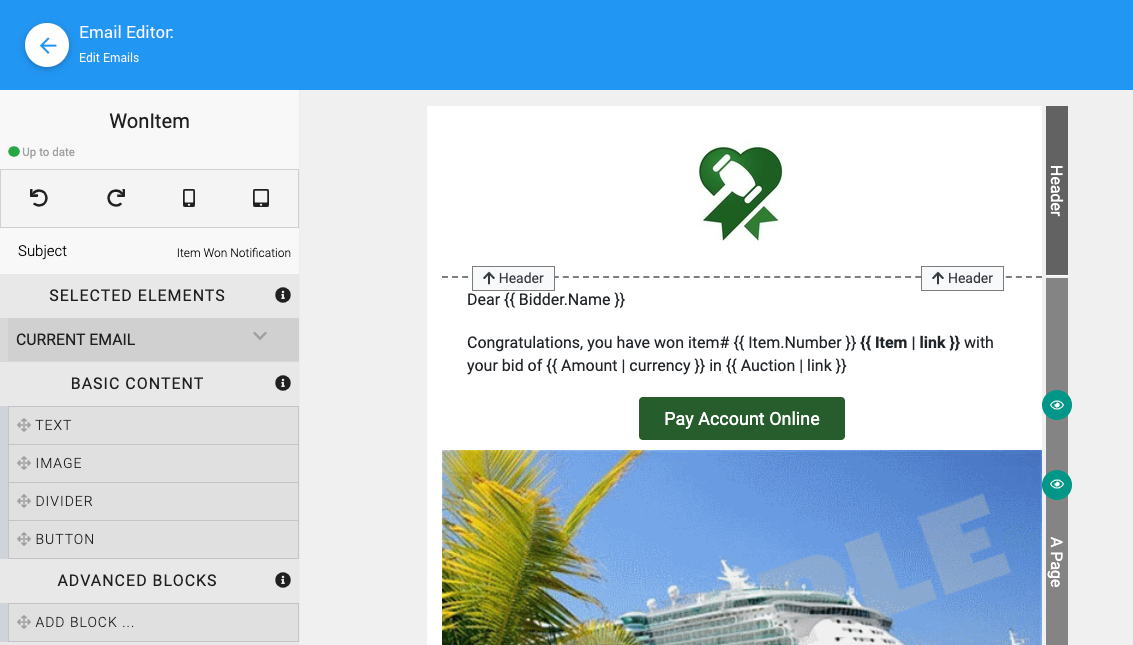
An example using the Item won (time) notification email.
Same Editor as the Website
When Editing Emails, you use the same core editor as the Introduction to Website Editor, with some minor changes to the interface that are related to emails.
Edit an Existing Element
For existing elements, especially a Text Element, you can usually double-click the text to open the element's editor. This is often a pop-up window.
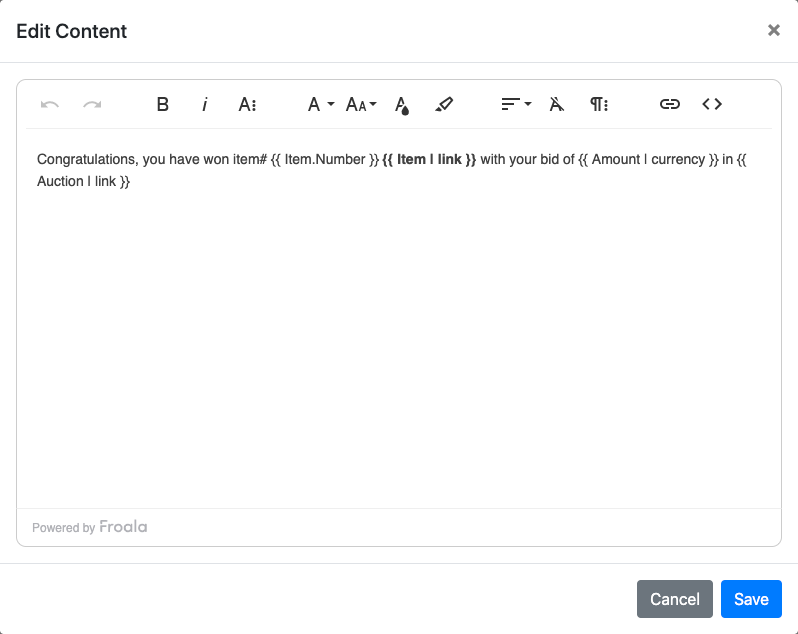
The editor for a Text element from a demonstration event.
- Add your custom content, or change the existing content.
- If the editor has a Save button (as in this example), click it to close the editor and add your new content.
- Save the email itself by clicking the Save Now button at the top of the Email Editor Sidebar. You need to do this after making any change.
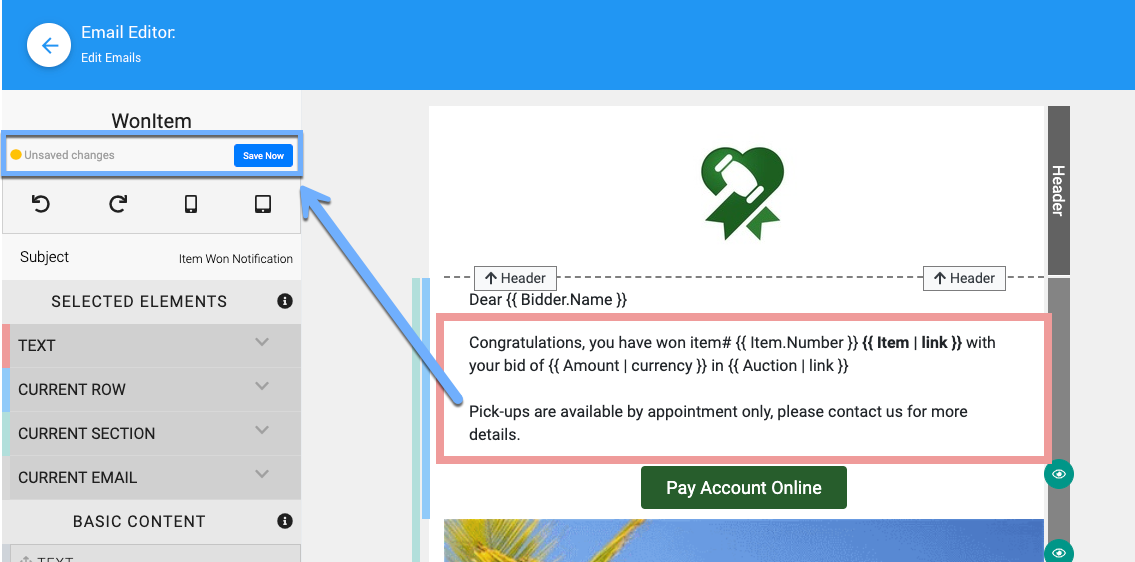
A modified email with unsaved changes, with the Save Now button at the top of the sidebar.
Your email is now ready to go with your new information.
Other Ways to Edit an Element
You can also edit an element by selecting it and working with its properties in the Email Editor Sidebar. Or, hover over the element, click the blue cog icon, and then click the pencil icon that appears.
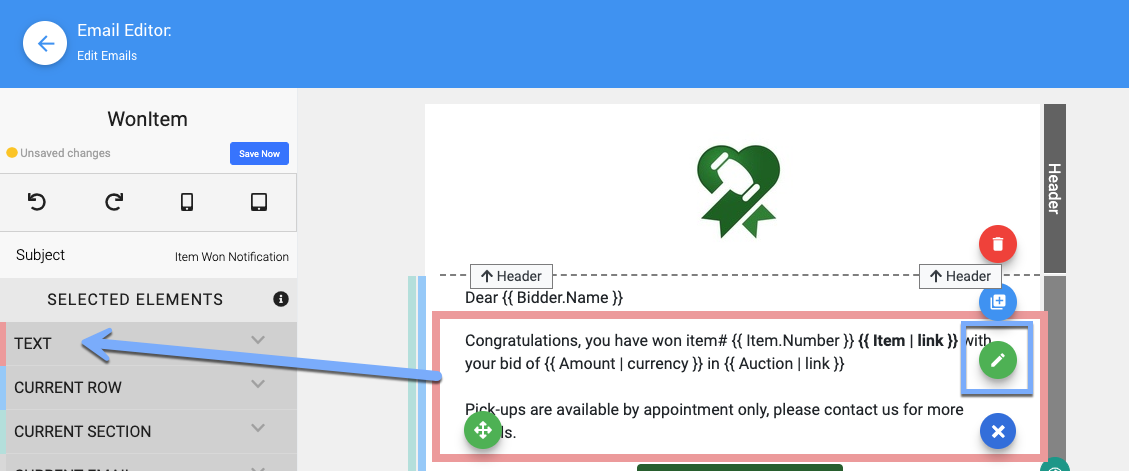
The pencil icon that appears after you click the blue cog icon.
Remove the Wrappers From Placeholder Content
When you replace placeholder content with your actual "hard-coded" details, remember to remove the wrappers ({{ and }}). If you don't, your emails will generate errors and won't be sent.
Add a New Element
Sometimes editing an existing element doesn't give you the look and feel you want. In that case, you can add a new element of the kind you need, wherever you want it, and add the content you want to share.
See the sections under Introduction to Event Websites for the elements available and how to insert them into an email.
The Email Editor Works Like the Website Editor
Remember, the Email Editor works just like the Website Editor.
For more details on customizing emails, see Editing Emails.