Standalone Card Readers
Set up and use standalone credit card readers with Auctria.
Standalone card readers let you accept credit card payments at your event without needing a computer or tablet at the checkout station. The reader connects directly to Stripe and processes payments independently.
Supported Reader
Only the BBPOS WisePOS E reader is currently supported and must be ordered directly through Stripe.
Setup Overview
Setting up a standalone card reader involves these steps:
- Connect your Stripe account to Auctria
- Order the card reader from Stripe
- Configure the reader's internet connection
- Set your organization's location
- Enable credit card reader support in Auctria
- Register the reader with your Stripe account
- Connect to the reader from your browser
Step 1: Connect Your Stripe Account
You must have a Stripe account connected to Auctria before using card readers.
See How To Connect A Stripe Account for detailed instructions on connecting Stripe.
Step 2: Order the Card Reader
Where to order:
You must order the BBPOS WisePOS E reader directly from Stripe. You cannot purchase it from other retailers.
How to access the Stripe store:
- Sign in to your Stripe account
- Click the Terminal link on your Stripe dashboard, or
- Go directly to dashboard.stripe.com/terminal/shop
Shipping:
Hardware ships directly from Stripe. Typical delivery time is 3-5 days.
Order a Test Card
We strongly recommend ordering a Stripe test card (about $5) along with your reader. This lets you practice using the checkout app and run test events without charging real credit cards. Canadian customers using Interac can also order a separate Interac test card.
Step 3: Configure the Reader's Internet Connection
The WisePOS E reader must be connected to the internet to process payments. You can connect via:
- Built-in Wi-Fi (most common), or
- Hardwired ethernet (requires optional dock)
Initial setup:
Follow Stripe's setup guide at stripe.com/docs/terminal/payments/setup-reader/bbpos-wisepos-e
Update the Reader Early
The reader automatically downloads and installs firmware updates. Power it on and connect it to the internet several hours before your event to ensure it's fully updated.
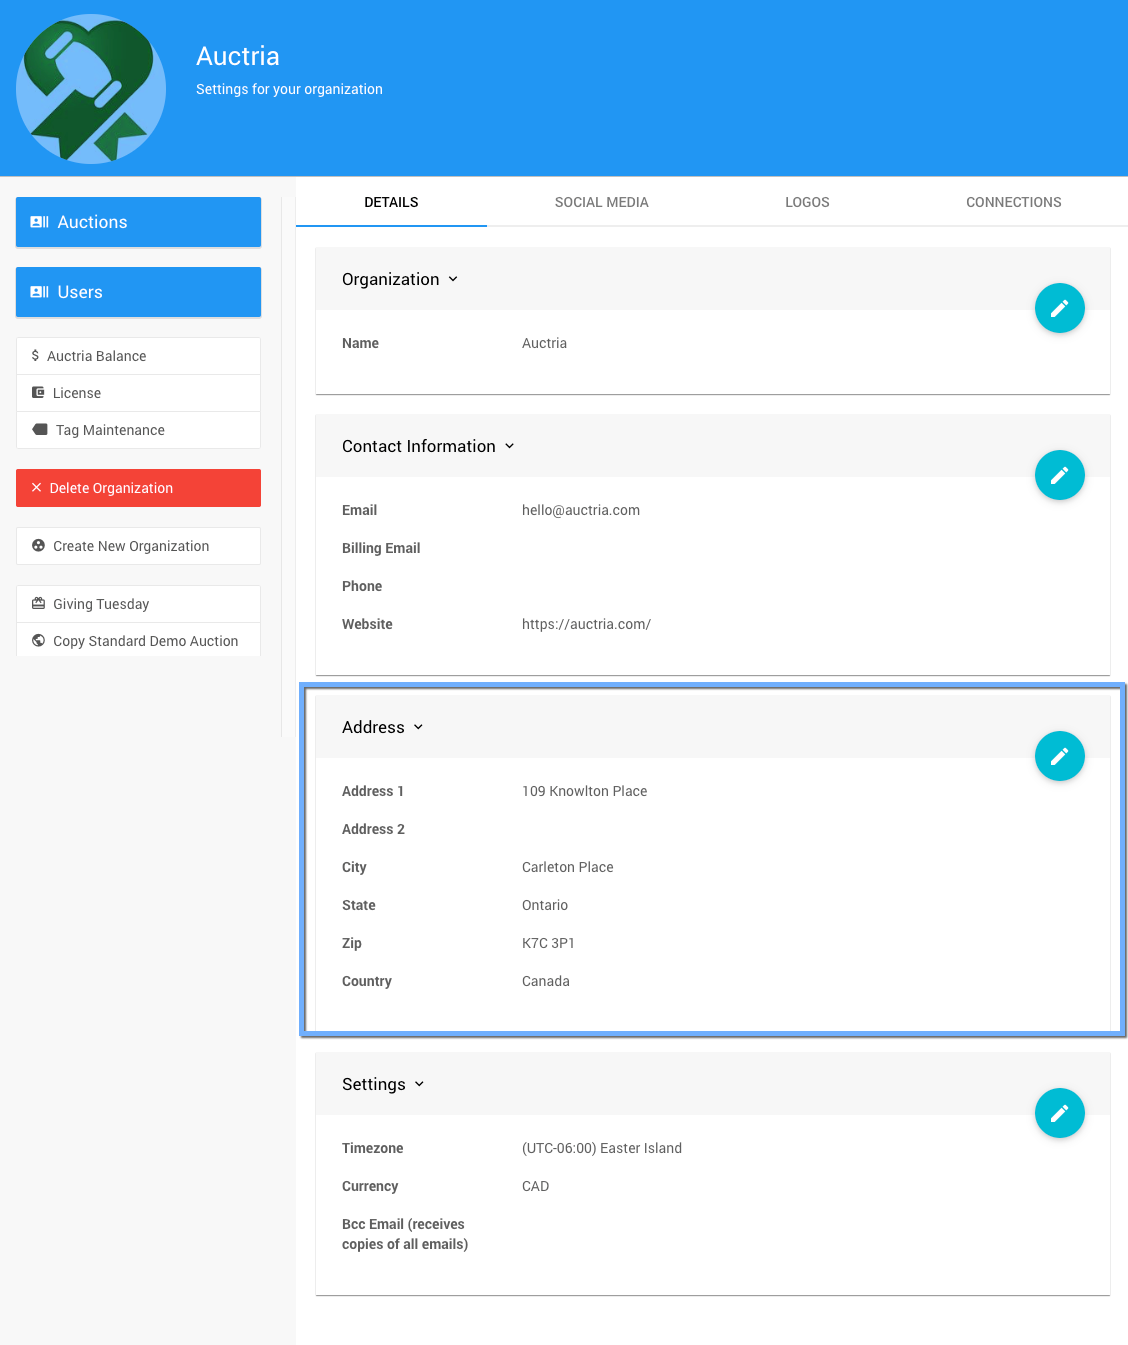
Step 4: Set Your Organization's Location
Stripe requires a location for each reader to ensure the correct devices are used (for example, US readers can't be used in Canada) and to help with fraud detection.
Auctria uses the address from your Organization page for this location. The address doesn't need to be the exact event location, but it must be in the correct country.
To verify or update your address:
- Go to the Organizations page in your dashboard
- Check the address in the Contact Information section
- Update if necessary
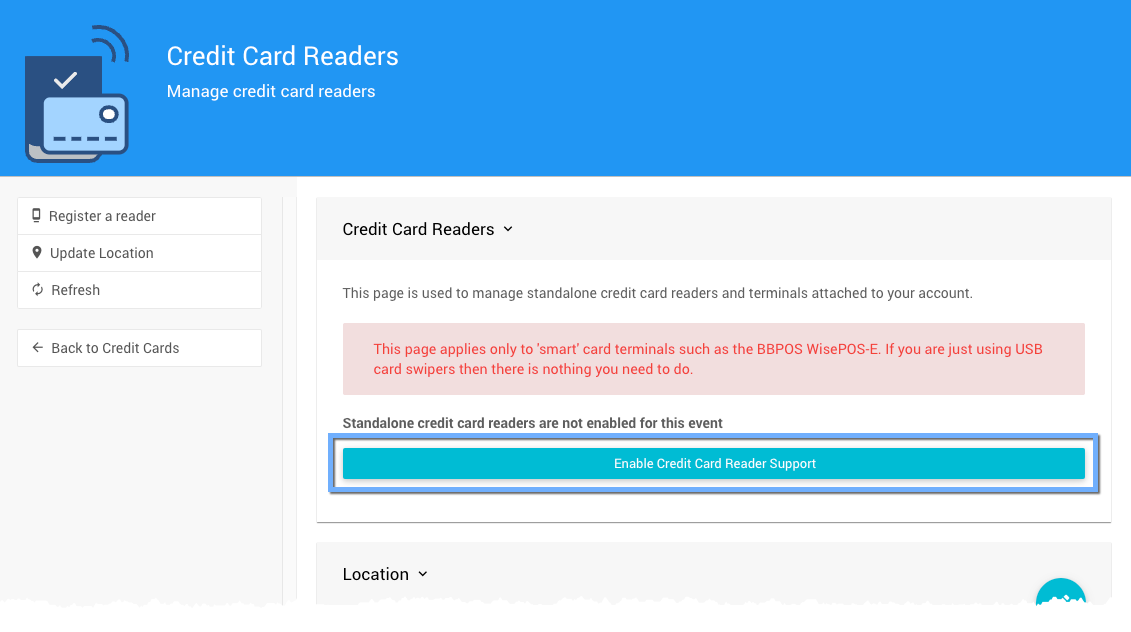
Step 5: Enable Credit Card Reader Support
- From the main dashboard, click Credit Cards
- Click Credit Card Readers
- Click Enable Credit Card Reader Support
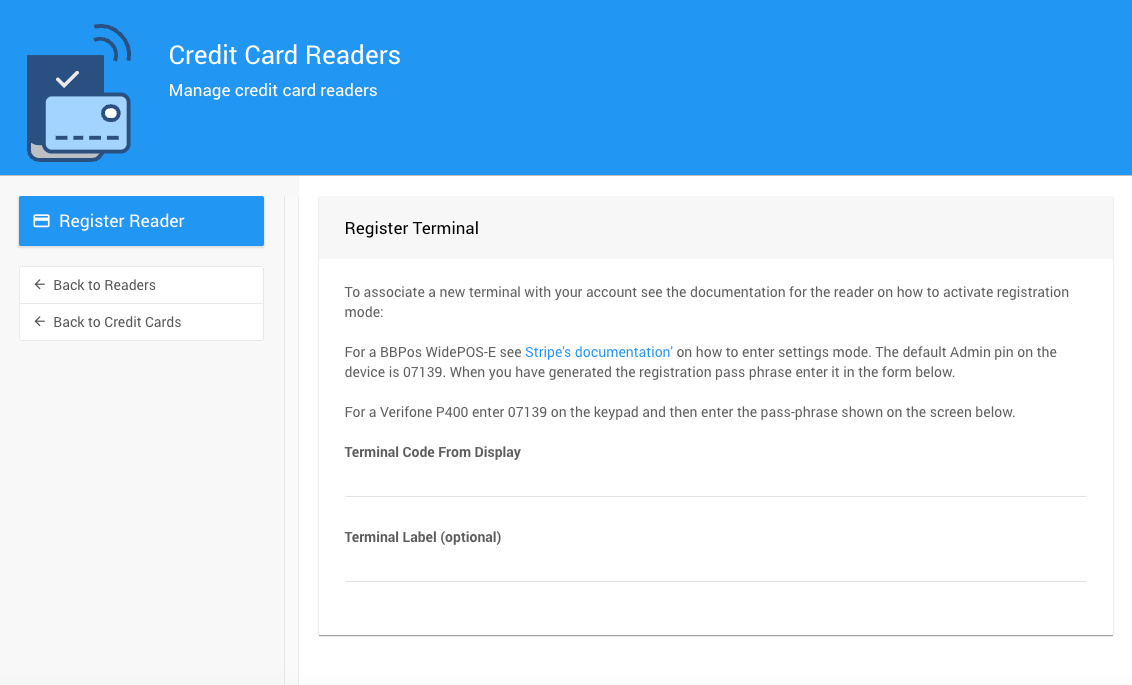
Step 6: Register Your Reader
Before using a reader for the first time, you must register it with your Stripe account.
Generate a Pairing Code on the Reader
- Power on the reader and ensure it's connected to the internet
- Swipe from the left edge of the screen
- Tap Settings
- Enter the admin PIN (default is 07139 if you haven't changed it)
- Tap Generate pairing code
Register in Auctria
- Click the Register a reader button in the dashboard
- Enter the pairing code from the reader
- Give your reader a descriptive name (like "Front Table Reader" or "Checkout Station 1")
- Click Register reader
Step 7: Connect to Your Reader
After registration, you can connect your browser to the reader.
Connection Rules
- A reader can only connect to one browser tab at a time
- Your browser can only connect to one reader at a time
To connect:
- Go to the Credit Card Readers page (or open a payment form)
- You'll see a list of available readers
- Click the green Connect button next to your reader
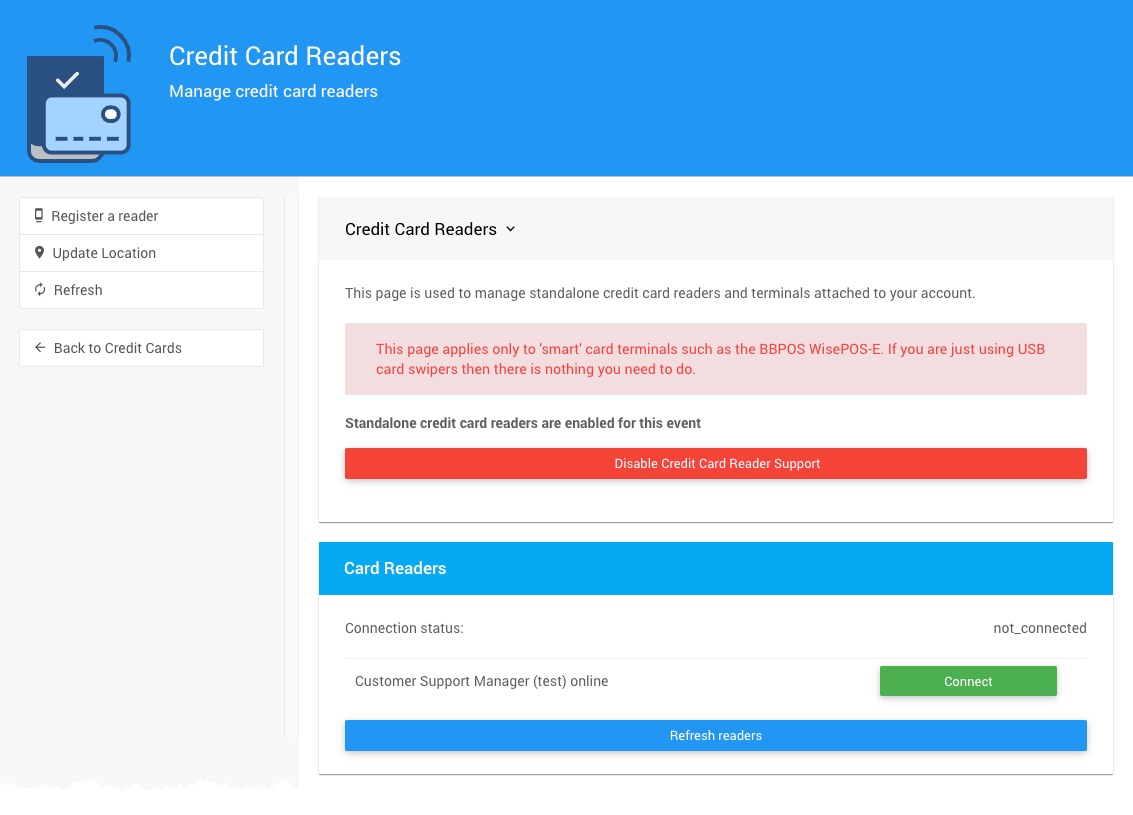
Once connected, your browser remembers the connection and will automatically reconnect if you refresh the page.
Same Network Required
To ensure a successful connection, make sure your computer and the card reader are both connected to the same Wi-Fi network.
Using Your Reader
Once connected, you can:
- Process payments from the checkout page
- Register cards from the check-in page
- Accept contactless payments (tap-to-pay, mobile wallets)
The reader will display prompts to the customer and automatically communicate with Auctria to complete transactions.
Troubleshooting
Reader won't connect
Ensure both your computer and the reader are on the same Wi-Fi network. Try refreshing the page or restarting the reader.
Pairing code not appearing
Make sure the reader is connected to the internet and try generating a new code.
Reader shows old firmware
Leave the reader powered on and connected to Wi-Fi for a few hours to allow updates to download and install.
Can't register the reader
Verify your organization's location is set to the correct country on the Organization page.
Last reviewed: February 2026