Filters
Create custom filters to select and organize data across all your events.
Filters let you create powerful, reusable conditions to find specific items, participants, or other records across all events in your organization. For example, you could create a filter to find "all participants with an outstanding balance over $50" or "all items valued between $100 and $500."
Accessing Filters
To manage your filters:
- From the main Event Dashboard, click Organizations in the sidebar
- Click Filters on the Organization page
This opens the Filters page where you can view existing filters and create new ones.
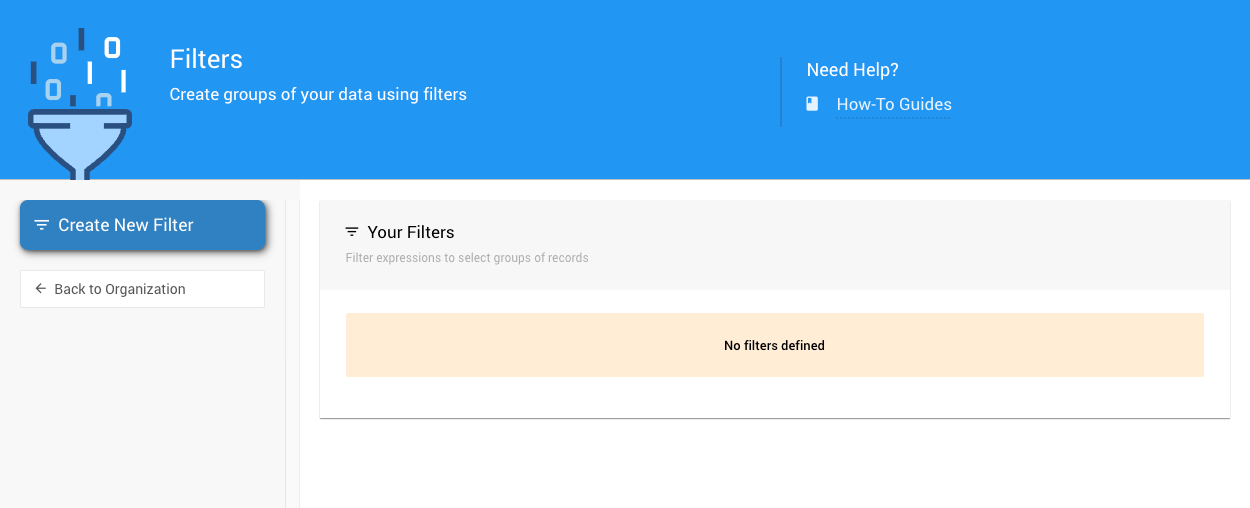
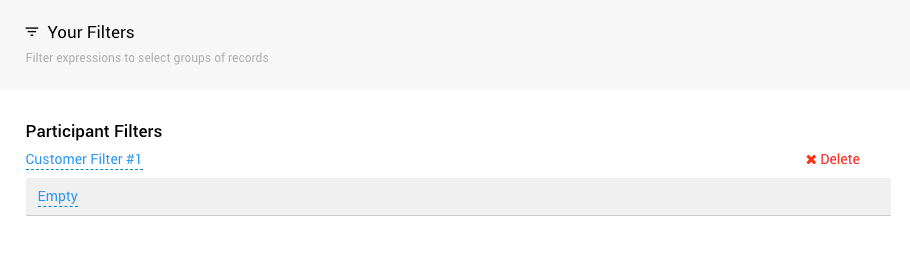
Viewing Your Filters
Once you've created filters, they'll appear in the "Your Filters" section. Each filter shows its name, the table it applies to, and the conditions it uses.
You can use these filters throughout Auctria anywhere you need to select or organize data—like when running reports, sending emails, or making bulk changes.
Creating a New Filter
To create a filter:
- Click the Create New Filter button
- Fill in the filter details in the popup window
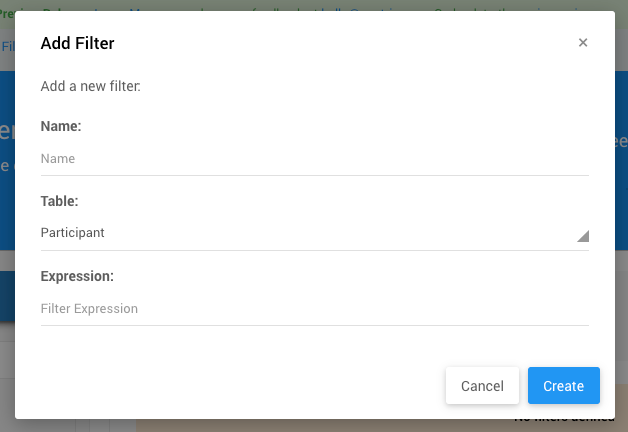
Name
Give your filter a descriptive name that makes it easy to identify. For example:
- "High Value Items"
- "Participants with Outstanding Balance"
- "VIP Ticket Holders"
Table
Select which table this filter applies to from the dropdown menu:
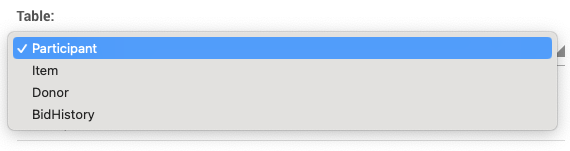
Common tables include:
- Items: For auction items, tickets, and products
- Participants: For people registered for your event (Bidders)
- Transactions: For purchases and bids
Choose the table that contains the data you want to filter.
Expression
The expression is where you define the condition your filter will check. This is what determines which records match your filter.
Think of it as a question: "Which records meet this condition?"
For example:
value > 100means "which items have a value greater than 100?"outstandingBalance > 0means "which participants have an outstanding balance?"
Writing Filter Expressions
Basic Structure
Filters use simple comparison logic. Here are the operators you can use:
Comparison Operators:
=equals>greater than<less than>=greater than or equal to<=less than or equal to
Logical Operators:
andor&&or&for combining conditions (both must be true)oror||or|for either condition (at least one must be true)notor!for negation (opposite of)
Common Filter Examples
For Items:
Find a specific item by title:
title = 'Best Seat in the House!'
Find high-value items:
value > 1250
Find items in a price range:
value > 100 and value < 400
Find specific item types:
type = 'Online'
Find multiple types:
type = 'Online' or type = 'forSale'
Find items that require receipts:
receiptRequired
Find items with no description:
description = ''
For Participants (Bidders):
Find participants with a balance due:
outstandingBalance > 0
Find participants who won at least one item:
itemsWon
Find participants who won a specific item:
itemsWon[item.number = '19']
Find participants with tickets but no meal choice:
HasAssignedTicket & MealChoice = ''
Find participants with specific tags:
tags = 'VIP'
Find participants with multiple tags:
Tags = 'GOLF' & Tags = 'SPONSOR-GUEST'
Find ticket purchasers who haven't specified guests:
purchasedTickets[not isSpecifiedGuest]
Advanced Filtering Through Sets:
You can filter through related records using brackets [ ]:
Find participants who won a specific item number:
itemsWon[item.number = '19']
Find participants who won items with a specific ticket type:
ItemsWon[Item.TicketType = 'Admission']
Find participants who won event items:
ItemsWon[Item.isEvent]
Important Limitations
No Arithmetic Operations
Filters don't support mathematical calculations. You cannot use expressions like:
startingBid + bidIncrement > 1000 ❌ This won't work
Instead, you must compare values directly to numbers or other fields.
Using Your Filters
Once created, your filters are available organization-wide. You can use them to:
- Select records when running reports
- Target specific groups when sending emails
- Make bulk changes to matching records
- Organize data in lists and exports
Filters apply across all events in your organization, making them powerful tools for consistent data management.
Tips for Effective Filters
Start simple: Begin with basic filters and build up to more complex ones as you get comfortable with the syntax.
Test your filters: After creating a filter, use it on a small set of data first to make sure it returns the results you expect.
Use descriptive names: Future you (and your team members) will appreciate clear filter names like "Items Over $500" instead of "Filter 3."
Save common searches: If you find yourself repeatedly searching for the same thing, create a filter for it.
Combine conditions carefully: When using and and or together, the order matters. Think through your logic before creating complex filters.
Last reviewed: February 2026