Activating & Deactivating Tickets
An overview of the activate/deactivate tickets process.
Need to deactivate a ticket that won’t be used? Or reactivate one that was deactivated by mistake? You can handle both actions easily from the Tickets dashboard.
This page walks you through how to deactivate or reactivate individual tickets—without needing to open the participant record.
If a ticket was purchased but won’t be used, you can deactivate it in just a few clicks.
From Participant Details
You can deactivate a ticket directly from a guest's record (Participant Details) using the Tickets tab.
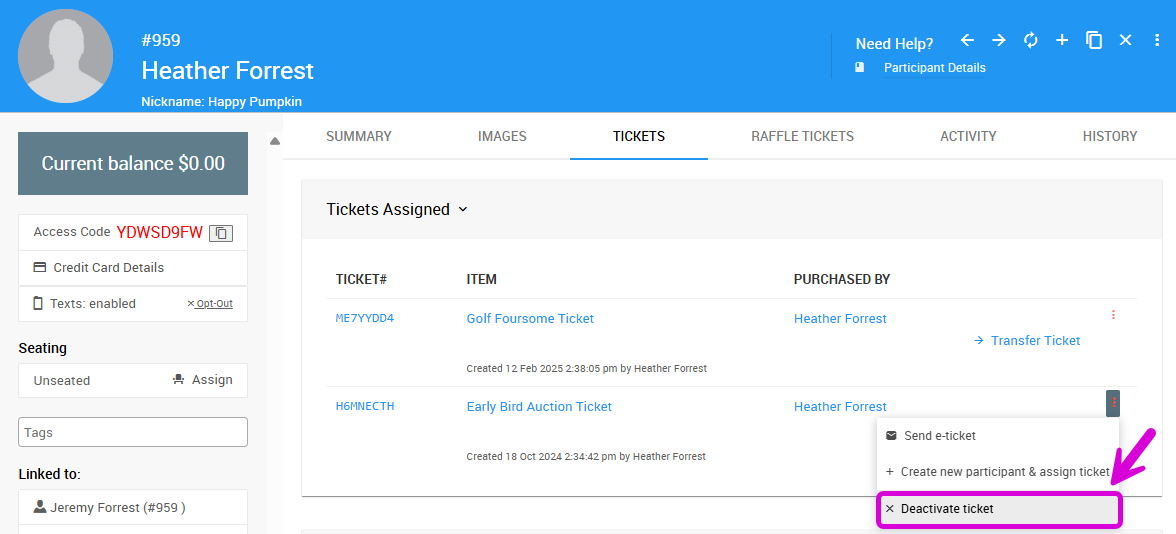
Click the ⁝ icon on the right side of the ticket you wish to deactivate, then click Deactivate ticket.
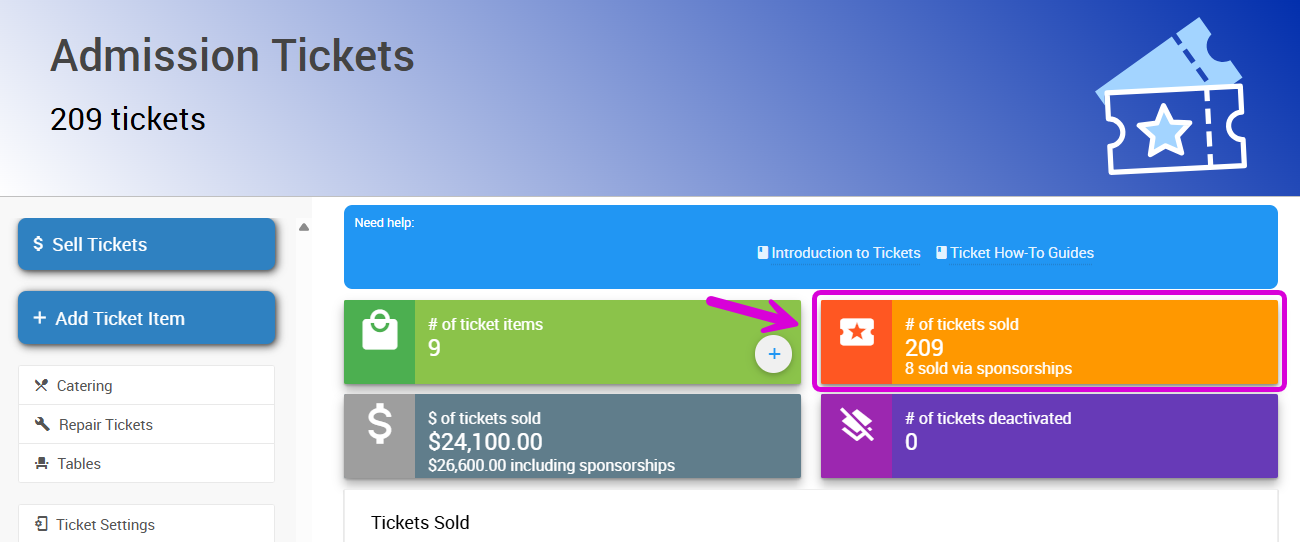
From Tickets Dashboard
- From the Tickets dashboard, click the # of tickets sold block to open the list of sold tickets.
- Use the search bar to find the purchaser by name, or scroll through the list to find the ticket you want to deactivate.
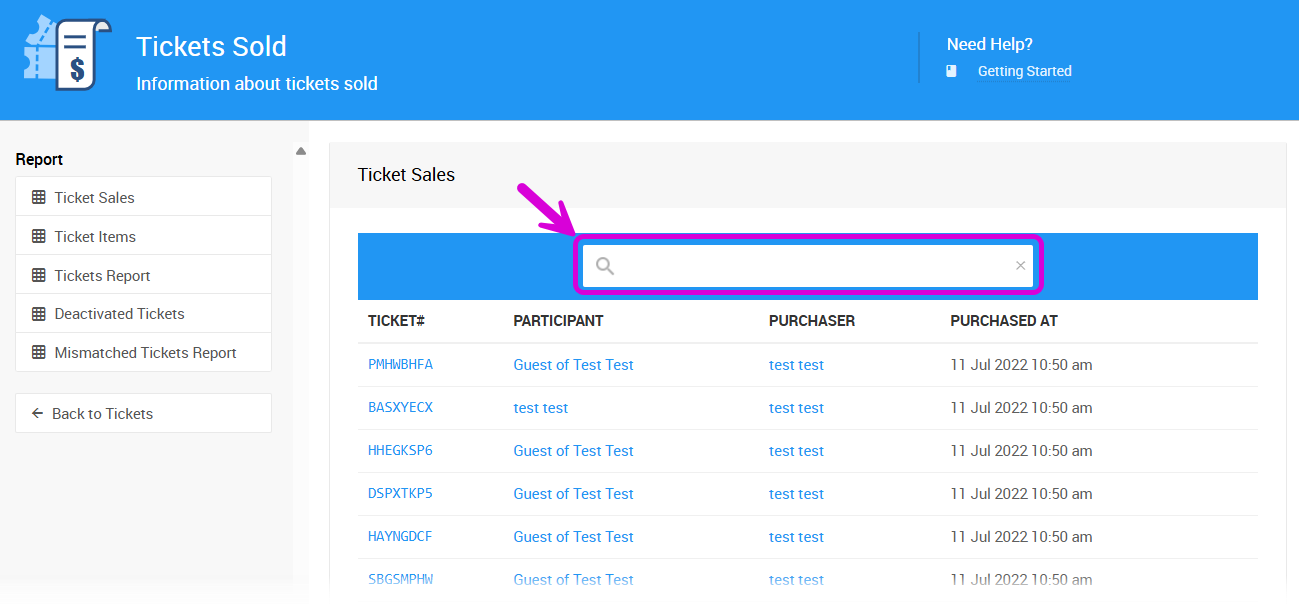
- Select the ticket to open its details.

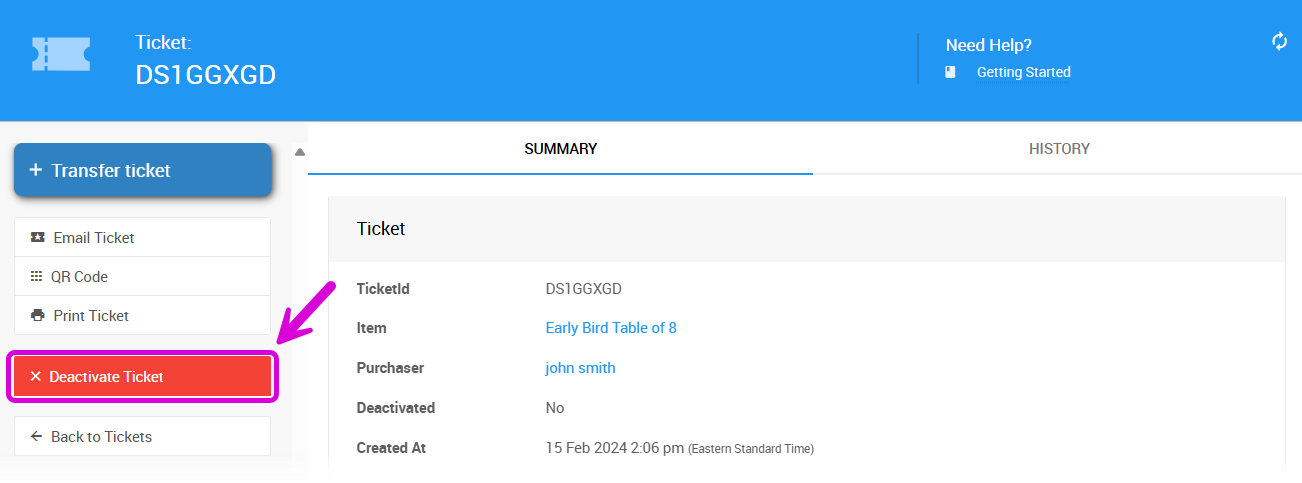
- On the left sidebar, click Deactivate Ticket and follow the confirmation prompt.
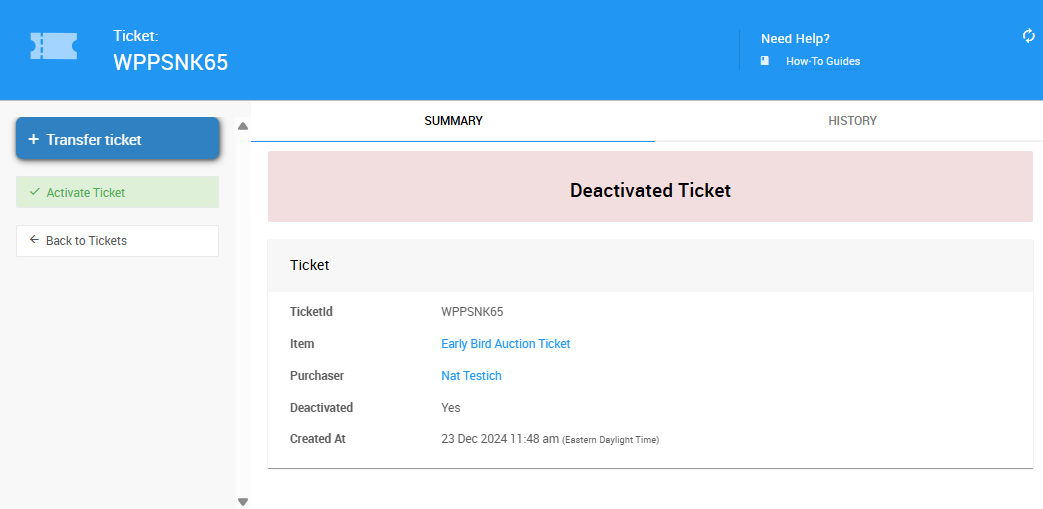
Deactivated Tickets
Once deactivated, a red "Deactivated Ticket" banner will appear at the top of the ticket details page.
Information
Deactivating a ticket does not remove the purchase or issue a refund.
If a ticket was deactivated by mistake—or if the guest changes their mind—you can reactivate it.
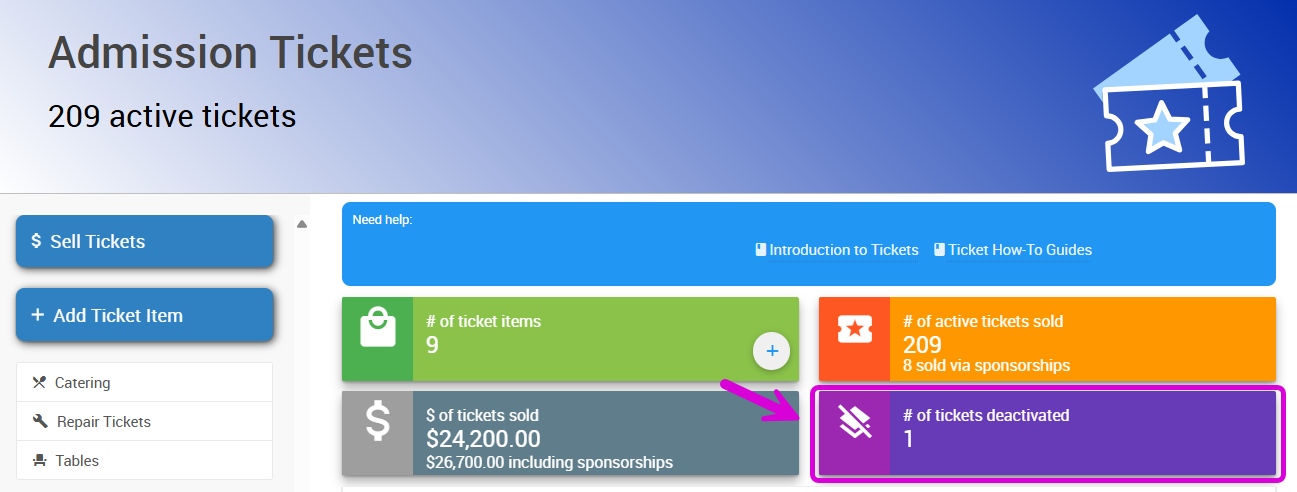
- From the Tickets dashboard, click the # of tickets deactivated block to open the list.
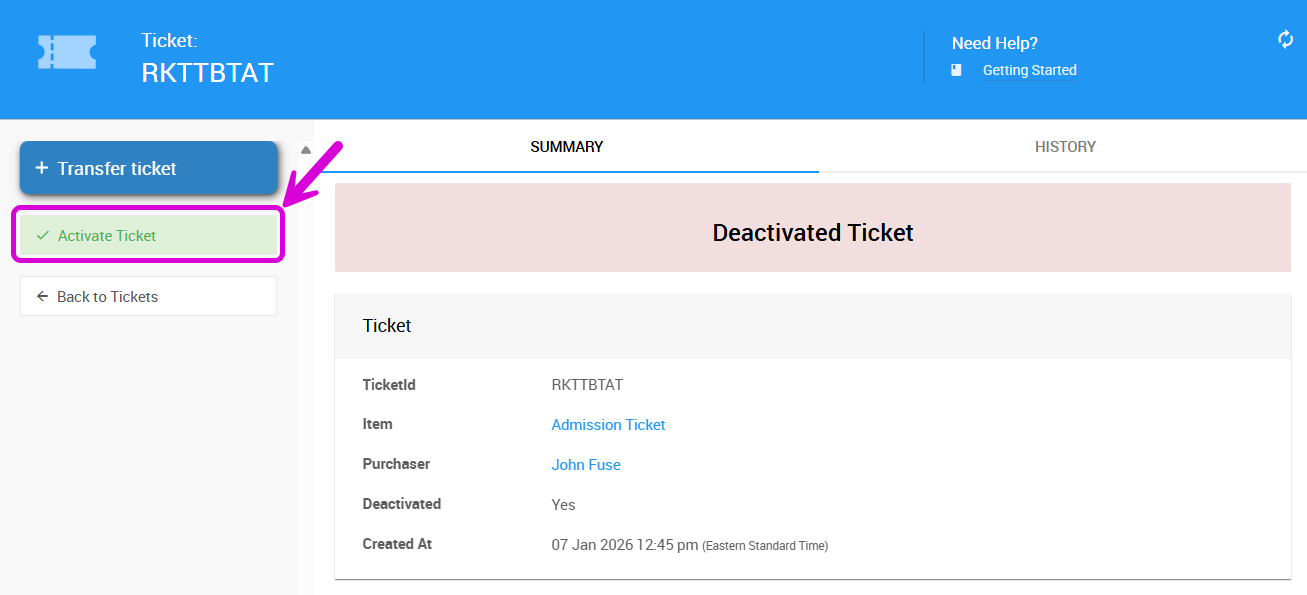
- Double-click the ticket you wish to reactivate.

- Click the Activate Ticket button on the left sidebar and follow the confirmation prompt.
Once reactivated, the red "Deactivated Ticket" banner will disappear from the ticket’s details page.
Information
Reactivating a ticket will not restore any guest assignment details that may have been previously added.
Last reviewed: January 2026